Cobalt Strike: Shellcode and Config extraction
Overview
Cobalt Strike is a commercial red team and adversary simulation tool. It is widely used by security professionals to assess the security of networks and systems by simulating advanced persistent threats (APTs). As everything, due to its powerful capabilities, it has also been misused by cybercriminals and threat actors.
In this post contains the analysis of two samples: Staged and Stageless payload. The extraction of the shellcode and the beacon for its configuration are quite similar in both payloads.
Analysis
Staged Payload
Lets start with the staged payload, the first thing that caught my attention in DiE was the lack of imports and some very suspicious APIs…

Lets start setting some breakpoints in the observed APIs in x64dbg. These APIs like VirtualAlloc and VirtualProtect can be used either to self injection or remote injection.
Note: Theres a bunch of APIs related to self injection or remote injection that we can set breakpoints like VirtualAllocEx, WriteProcessMemory, NtWriteVirtualMemory and others that can be used in the same context, for this analysis only VirtualAlloc will be enough.
|
|

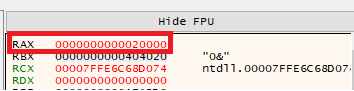
Running the debugger, it stop at the break point! Lets continue using the option “exec till return”

Now in RAX we can see the memory location that is being allocated: 0x2000000
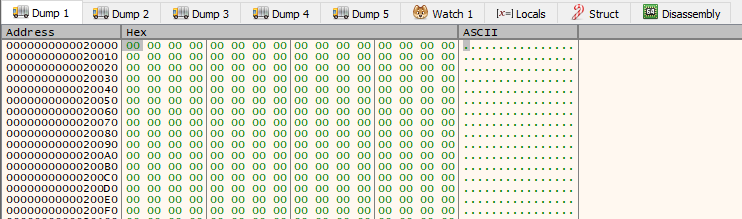
Right clicking the RAX value and following in dump the address. We can see that it is empty for now…..

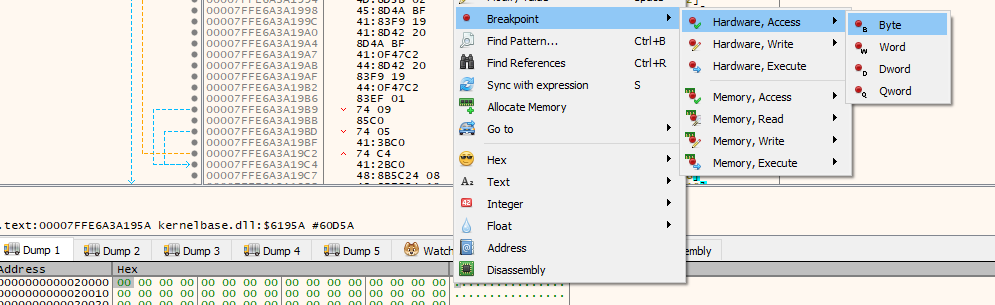
Lets monitor any content that will be written to this address using a hardware access breaking point in the first byte of the dump. Right Click on 0x00 on dump -> Breakpoint -> Hardware, Access -> byte.
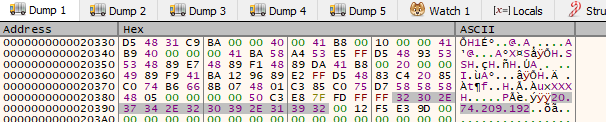
After resuming the execution it stopped again and we can see in dump the first change in the allocated memory,

In the instructions we can see that we are in a loop (For the shellcode be written in memory), lets add a break point where the jge points to:

Resuming the execution again, in the dump we can see that now we have a lot of stuff written in the allocated space: First of all the classic first bytes of a shellcode “FC 48 83 E4”, after that an user agent and a IP address.


Right clicking in the content of the dump we can use the disassembly function and see that the content became valid assembly instructions

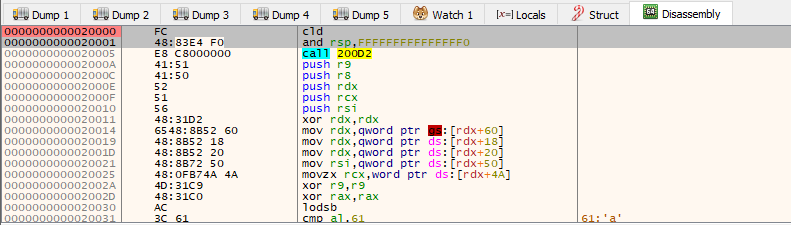
Now lets extract this shellcode! Right clicking again in the content of the dump and use “Follow in Memory Map” -> selecting the right region -> Dump Memory to File


And like that we can extract the shellcode! With the shellcode in hand we can emulate the execution and see some of its behavior. I am using speakeasy to emulate the execution.
|
|

With the result it is possible to see the shellcode opening the connection with the C2 IP address, downloading the content and allocating again some space in memory for the next stage.
And if resume the execution again in the debugger…..the ip don’t respond to any connections anymore so no more stages = no config extraction for this sample.
Stageless Payload
Lets analyze the stageless payload, so instead of using a shellcode to download and execute the next stage, this sample has everything that it needs to execute and establish the C2 connection after loading in memory the beacon.
The process is the same, so lets just extract the binary after being allocated in memory and dump to a file like previously done.
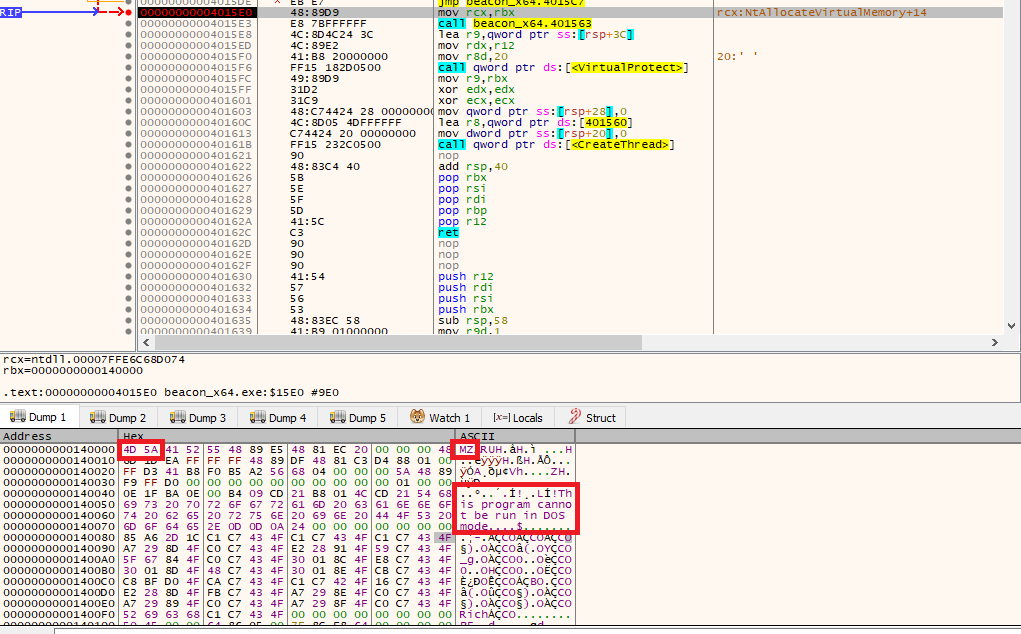
In the dump it is possible to see the magic bytes of a PE and strings related to the beacon.
After dumping to a file, using the tool CobaltStrikeParser created by SentinelOne team to extract the configs.
|
|
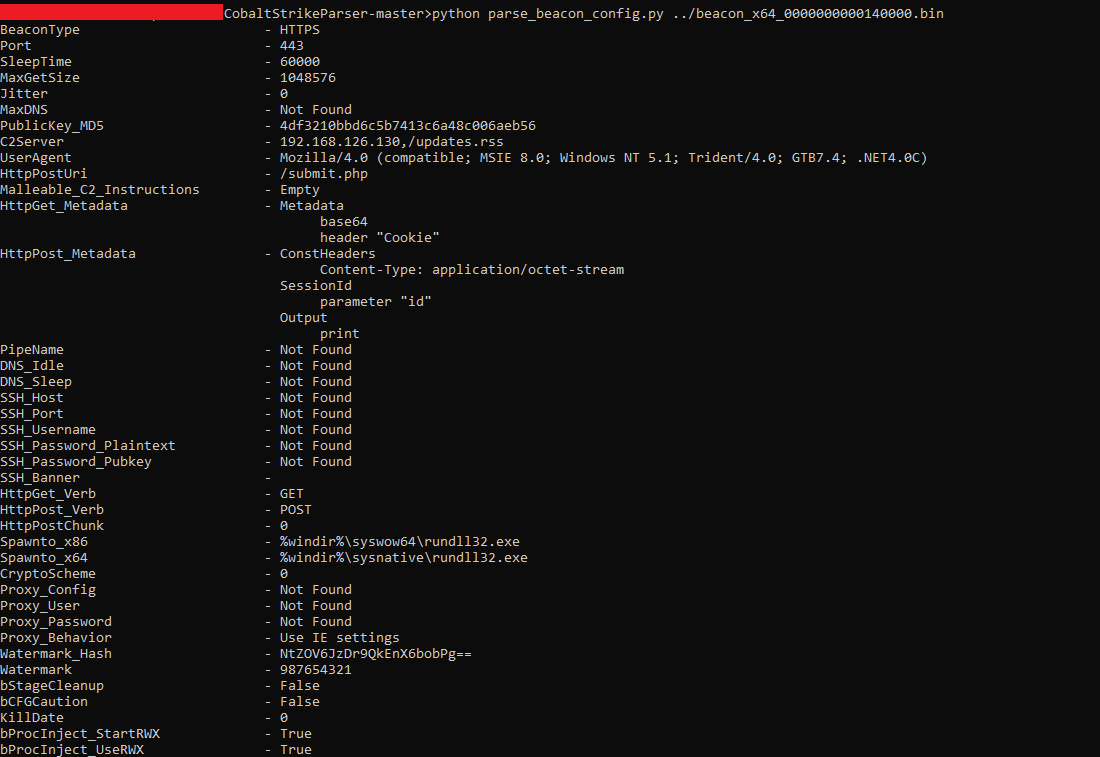
Success!
IoCs
Staged payload: b35e14dcab4d565e195937c12f10306eae56ac9e72245775e0b467c718c2e86c
IP: 20[.]74[.]209[.]192
Concluding Thoughts
The cobalt strike beacons has numerous techniques that could be explored here and in the wild it is common to see the droppers being protected by packers, crypters and protectors adding more complexity for the analysis, but for this post I’ll conclude the analysis of these samples here.
Thank you for taking the time to read this! Any questions or suggestions, feel free to contact me. Until next post :D